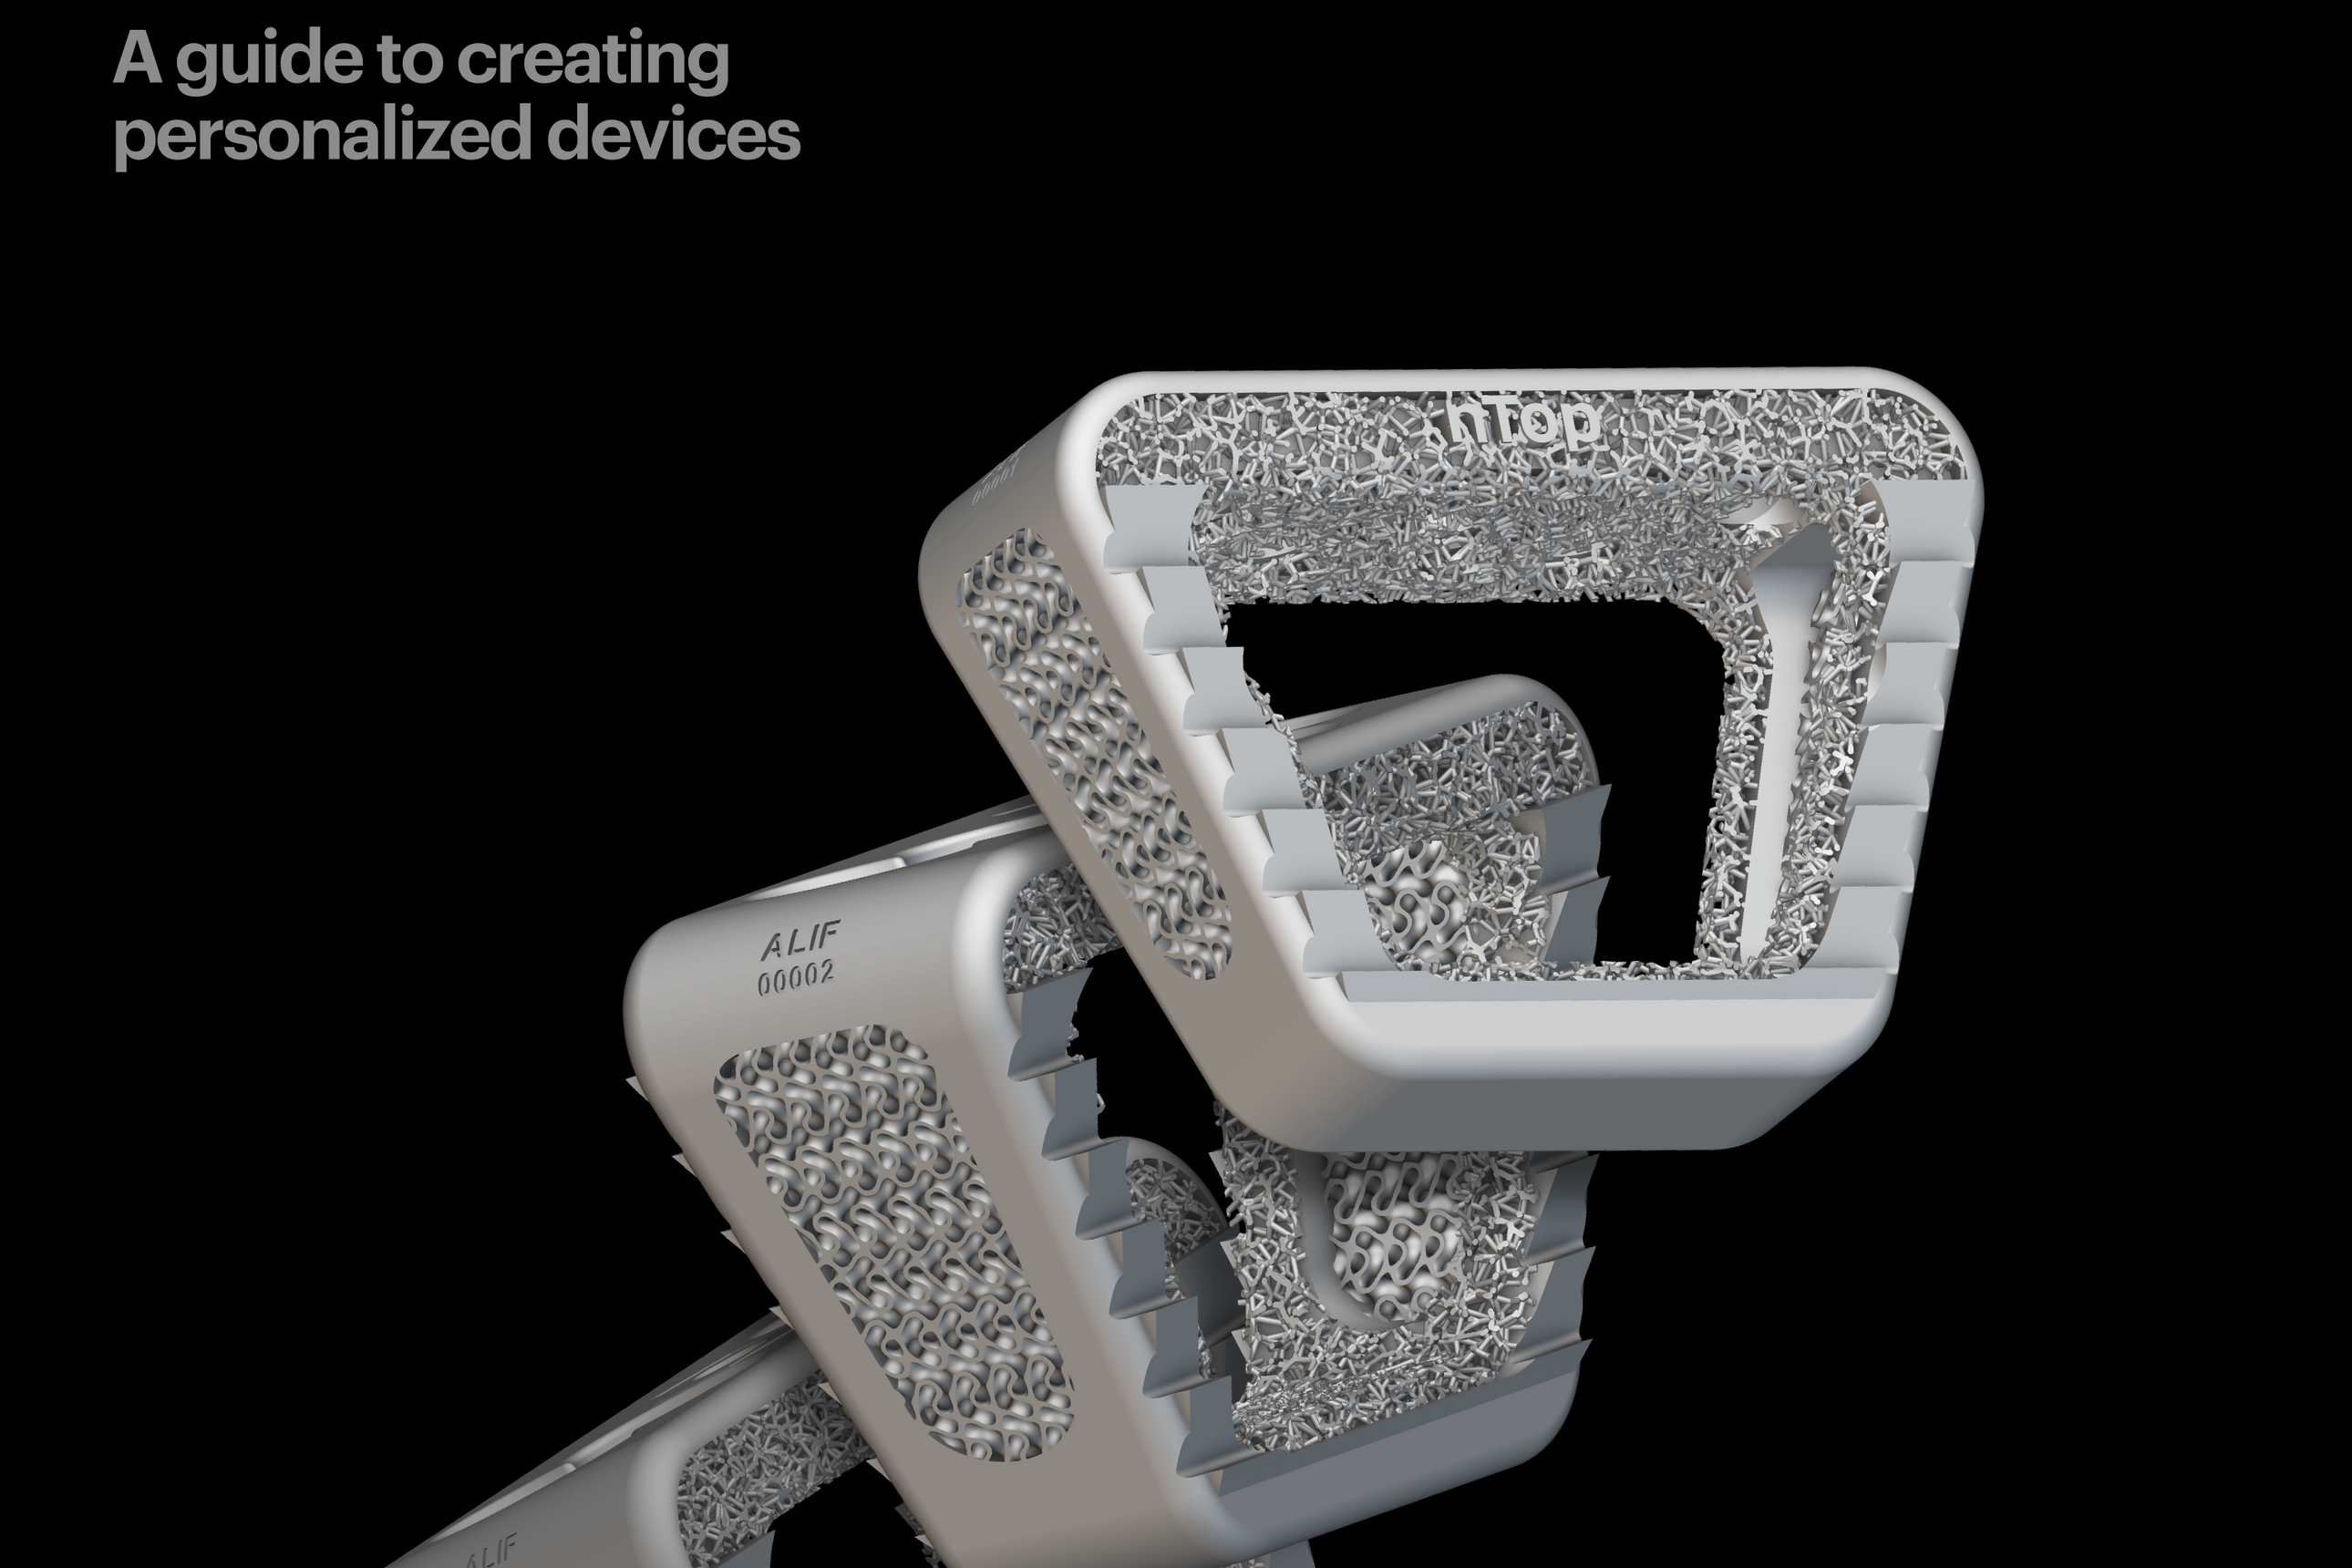
3D printing in prosthetics: A design guide
Written by nTop
Published on January 18, 2023
This article explores how 3D printing is radically changing the field of prosthetics. You will learn how you can take advantage of this new technology by embracing a digital workflow.
Personalized medical devices, including prostheses, are becoming increasingly common, allowing healthcare providers to offer treatments tailored to each patient's unique physiology and needs.
Customization is common in prosthetics, but traditional workflows are manual and rely on the technician having a high level of skill and expertise. Prostheses manufactured following a digital workflow are becoming more popular but still occupy a relatively small portion of the market.
This article will explore how digital workflows compare with traditional workflows in designing 3D-printed prostheses and outline important factors to consider when creating these devices.
Additive manufacturing in prosthetics
Additive Manufacturing (AM) has revolutionized the field of prosthetics by opening up new opportunities for customization, allowing patients with amputations and limb differences to access devices tailored to their needs.
Using 3D scanning data, AM enables you to accurately reproduce complex geometries in a fraction of the time and cost that traditional methods typically require. This level of control can significantly improve comfort levels and performance, especially in devices like prosthetic hands. AM also eliminates the need for expensive tooling typically used in handcrafting custom sockets, which results in further cost savings.
Another advantage of 3D printing prosthetic devices is faster development cycles, which can facilitate rapid design iteration to improve fit and comfort. In addition, the scalability of AM makes mass production more economically viable, reducing costs for healthcare providers and consumers.
Benefits of 3D printing for prostheses
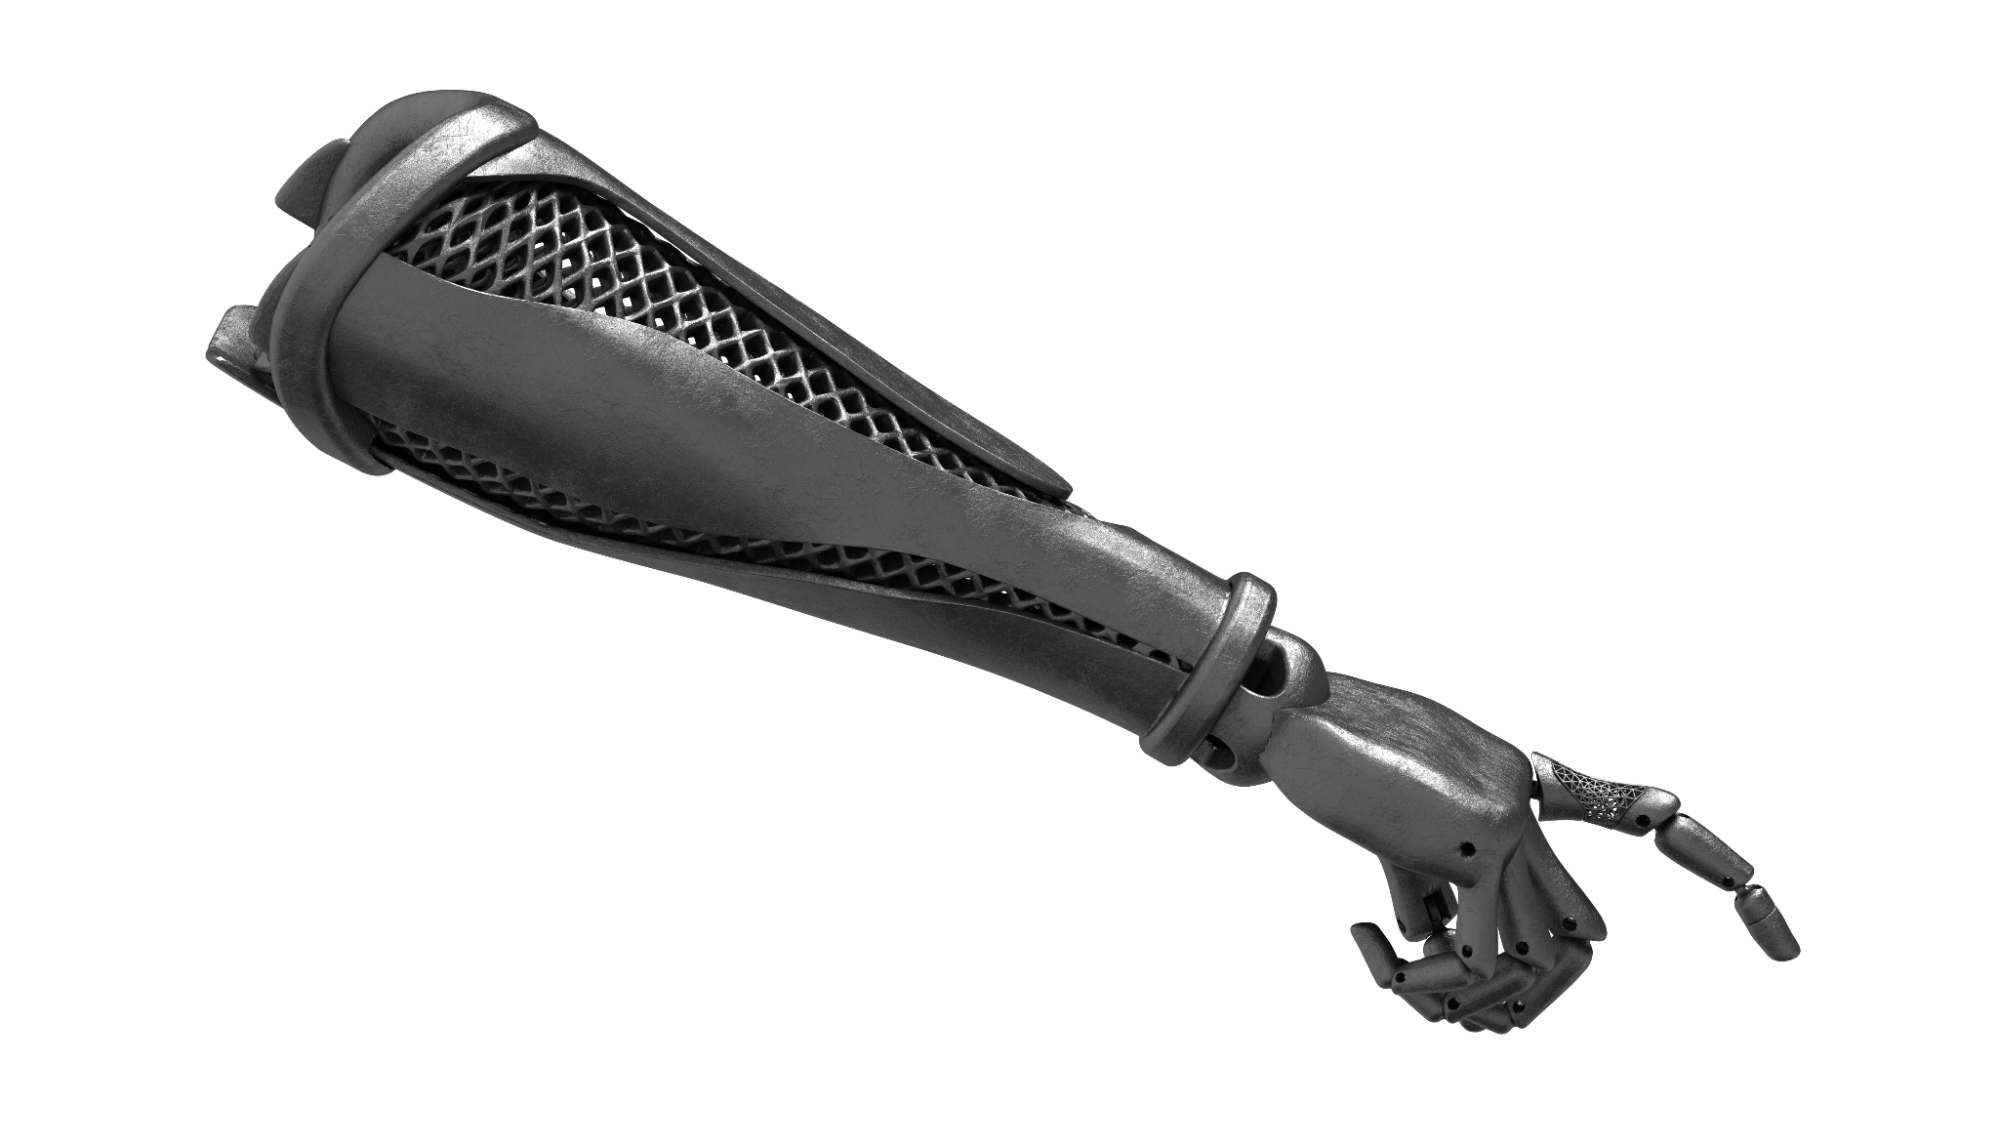
3D-printed arm prostheses concept designed by Jade Myers in nTop.
For patients needing a tailor-made prosthetic device, the design freedom associated with 3D printing technology provides endless opportunities for improved design and functionality. This means that 3D-printed prosthetic devices can offer superior comfort, customization, and cost-efficiency compared to traditionally manufactured devices.
3D printing enables you to create lighter designs, allowing patients to wear them more comfortably for extended periods. This is achievable because additive manufacturing enables you to create complex structures with minimal material consumption. Given that materials account for more than 40% of manufacturing costs, the opportunities for lightweighting can also result in cost savings.
From a design viewpoint, another advantage of 3D printing prostheses is the ability to create "dynamic behaviors." For example, the socket can be stiff where needed and, at the same time, have flexible structures with foam-like behavior for cushioning or dampening.
3D-printed covers are another trending personalization use case for prostheses, as they offer unique aesthetics and high durability.
Thanks to the rapid and precise scan-to-print process of additive manufacturing, you can quickly implement any necessary design adjustments. This is particularly beneficial in the case of prostheses for children, who may require multiple devices as they grow.
Traditional vs. digital fabrication of prostheses
Prosthetic leg.
Customization workflows that involve 3D scanning and additive manufacturing offer a more streamlined digital alternative to the manual, laborious, and expertise-intensive traditional process of creating a custom prosthetic socket.
Here's how the traditional and digital fabrication processes compare.
Traditional fabrication process
First, the prosthetist takes an impression or "cast" of the residual limb to make an exact copy of it. The manufacturer will use this cast to make custom-molded sockets with specific measurements tailored to fit each user according to their unique anatomy and range of motion. To create the custom-molded sockets, the thermoplastic material is heated to conform to the shape of the patient's amputated area.
Once the sockets are ready, you can connect them to off-the-shelf components that make up the artificial limbs. These components are designed for easy assembly and can be adjusted to ensure maximum comfort and functionality for each user.
Finally, you can fit the artificial limbs and make any necessary adjustments. This includes fine-tuning any tension or releasing joints and ensuring that all components are in alignment.
Digital fabrication process
The digital fabrication process begins with patient data acquisition. This involves capturing high-resolution anatomical data using 3D medical imaging technologies, like handheld 3D scanners, MRIs, or CT scans. You then segment and convert this data into digital surface meshes used in downstream design operations.
The second step is design generation. Depending on the customization strategy, you can generate the device's design with different levels of automation — you could opt for one-off manual designs or fully automated patient-matched devices. It is worth noting that the design process is as important as the design output to ensure regulatory compliance.
The next step is manufacturing. You can use 3D printing to produce your prosthesis directly or indirectly by creating custom tooling for the primary manufacturing process. Generally speaking, the direct approach is the better option when developing prostheses with design features that are only feasible with AM. However, the economics of the indirect approach scale better at large production volumes.
In both cases, the prosthesis must undergo specific post-processing after manufacturing to fulfill all the necessary functional requirements or improve the device's aesthetics.
Lastly, you can deliver the device to the patient. Since the device matches the patient's anatomy and physiology, the effort required by the medical practitioner to fit the prosthesis should be minimal.
Advantages of the digital fabrication process
Digital fabrication process for prosthetic leg designed by LifeNabled.
Adopting a fully digital fabrication process offers many advantages in prosthetic component development.
For medical device manufacturers, creating comfortable, well-fitted prostheses can be expensive and require highly skilled experts. With the increasing demand for more complex products, healthcare providers are always trying to make production more efficient.
Digital fabrication can help healthcare providers achieve this by reducing the number of processes and manual steps necessary to bridge the gap between the product and the patient. By beginning with a scan, providers can customize and create precise digital models ready for production, saving time and money. Once you have designed the prosthetic, 3D printing enables you to manufacture complex geometries that are impossible to create with other production technologies.
This digitalization process results in lower wait times for the patient, more comfortable and customized fit, and time and cost-savings for the provider. Moreover, by automating this process, the healthcare provider can spend more time with the patient, optimizing for fit and comfort.
Digitalization also creates opportunities for developing new geometries, which can be easily adapted to meet a patient's personal wishes for aesthetics and function.
Once approved, the design can be manufactured and iterated quickly. With traditional fabrication processes, on the other hand, the healthcare provider often needs to begin from scratch if alterations are necessary.
Digital fabrication processes also help the industry evolve because they create opportunities and time for experts to innovate and develop new ideas.
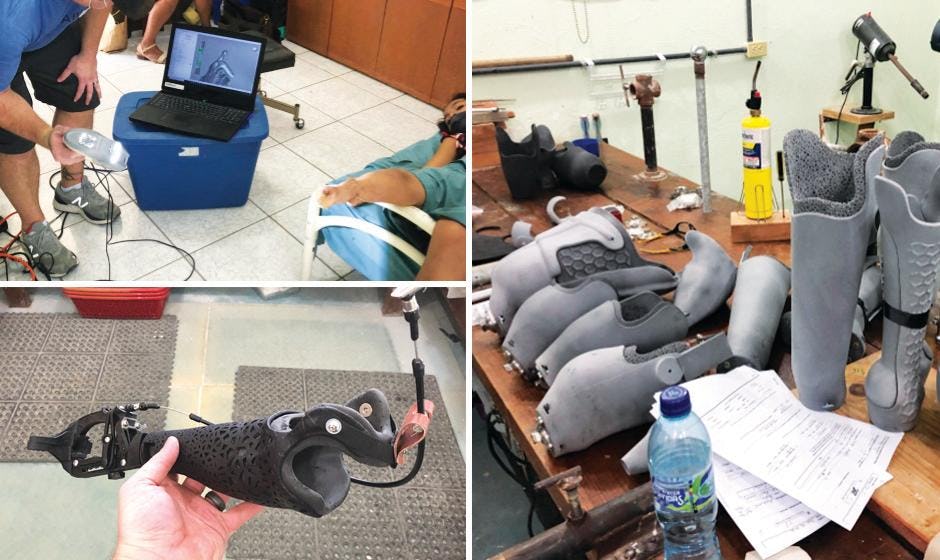
Case study: LifeNabled
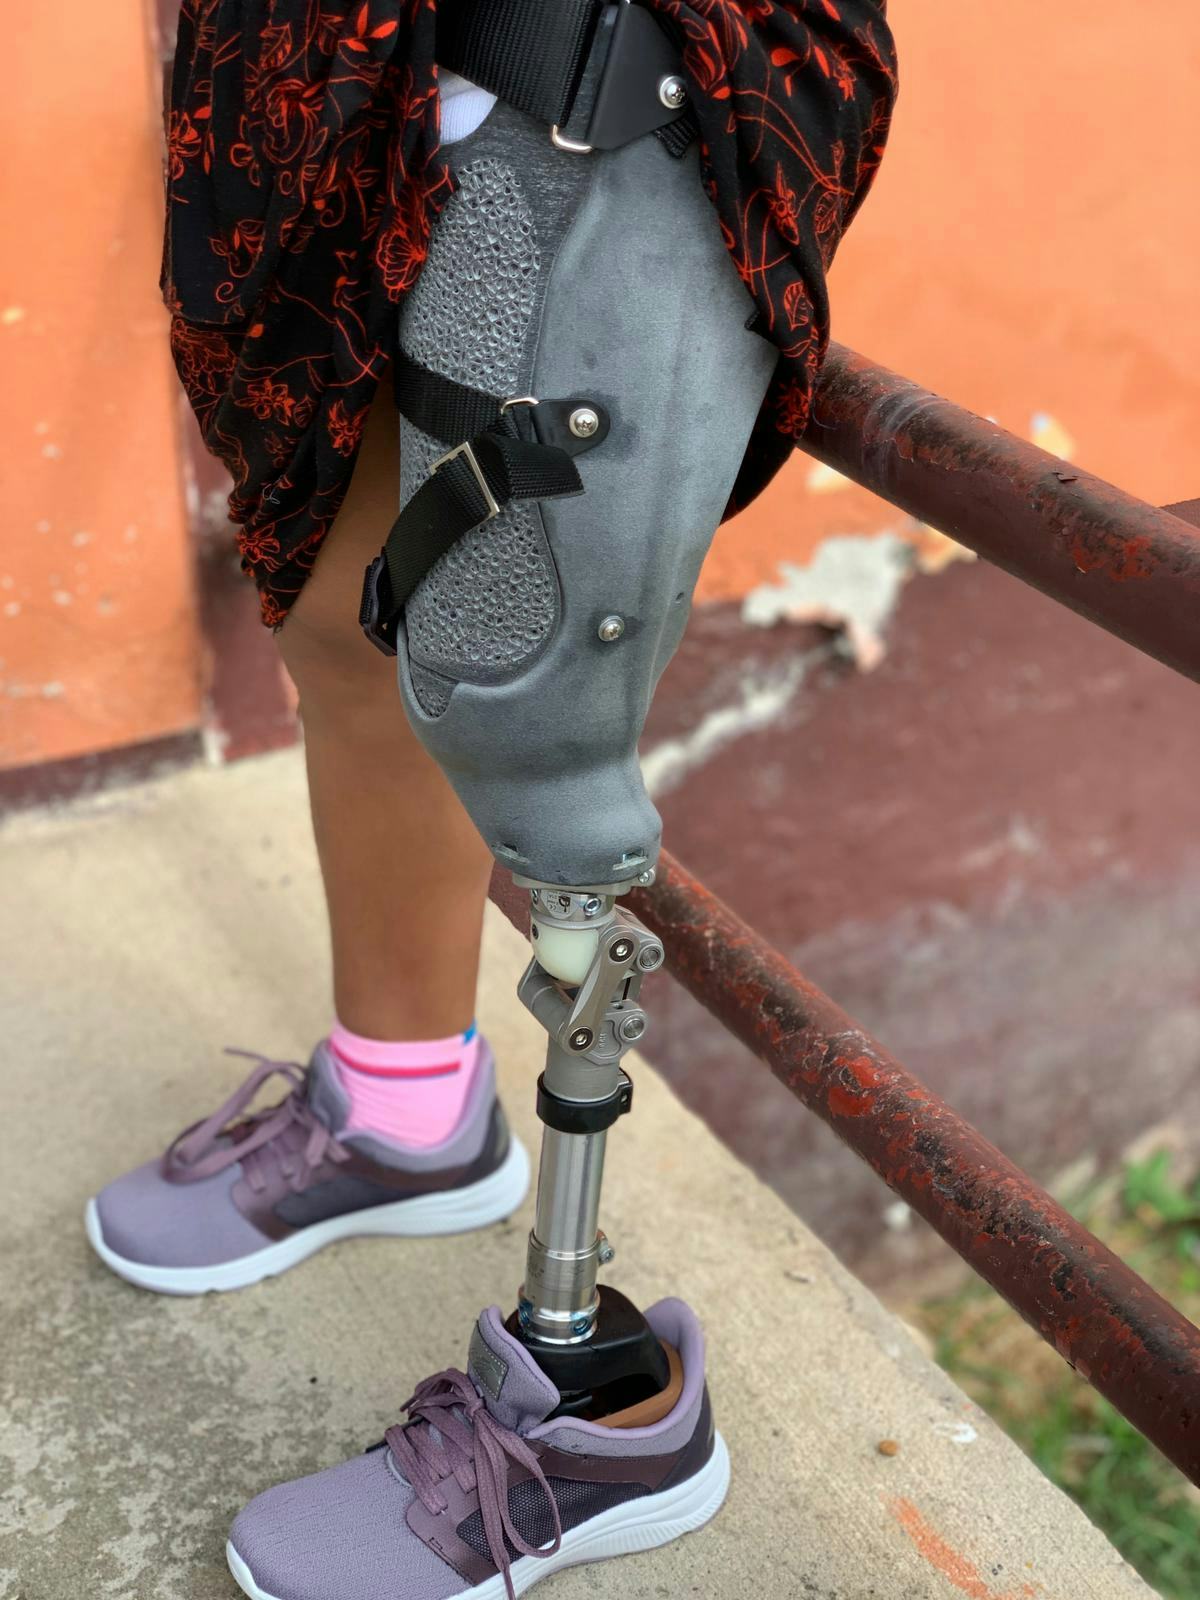
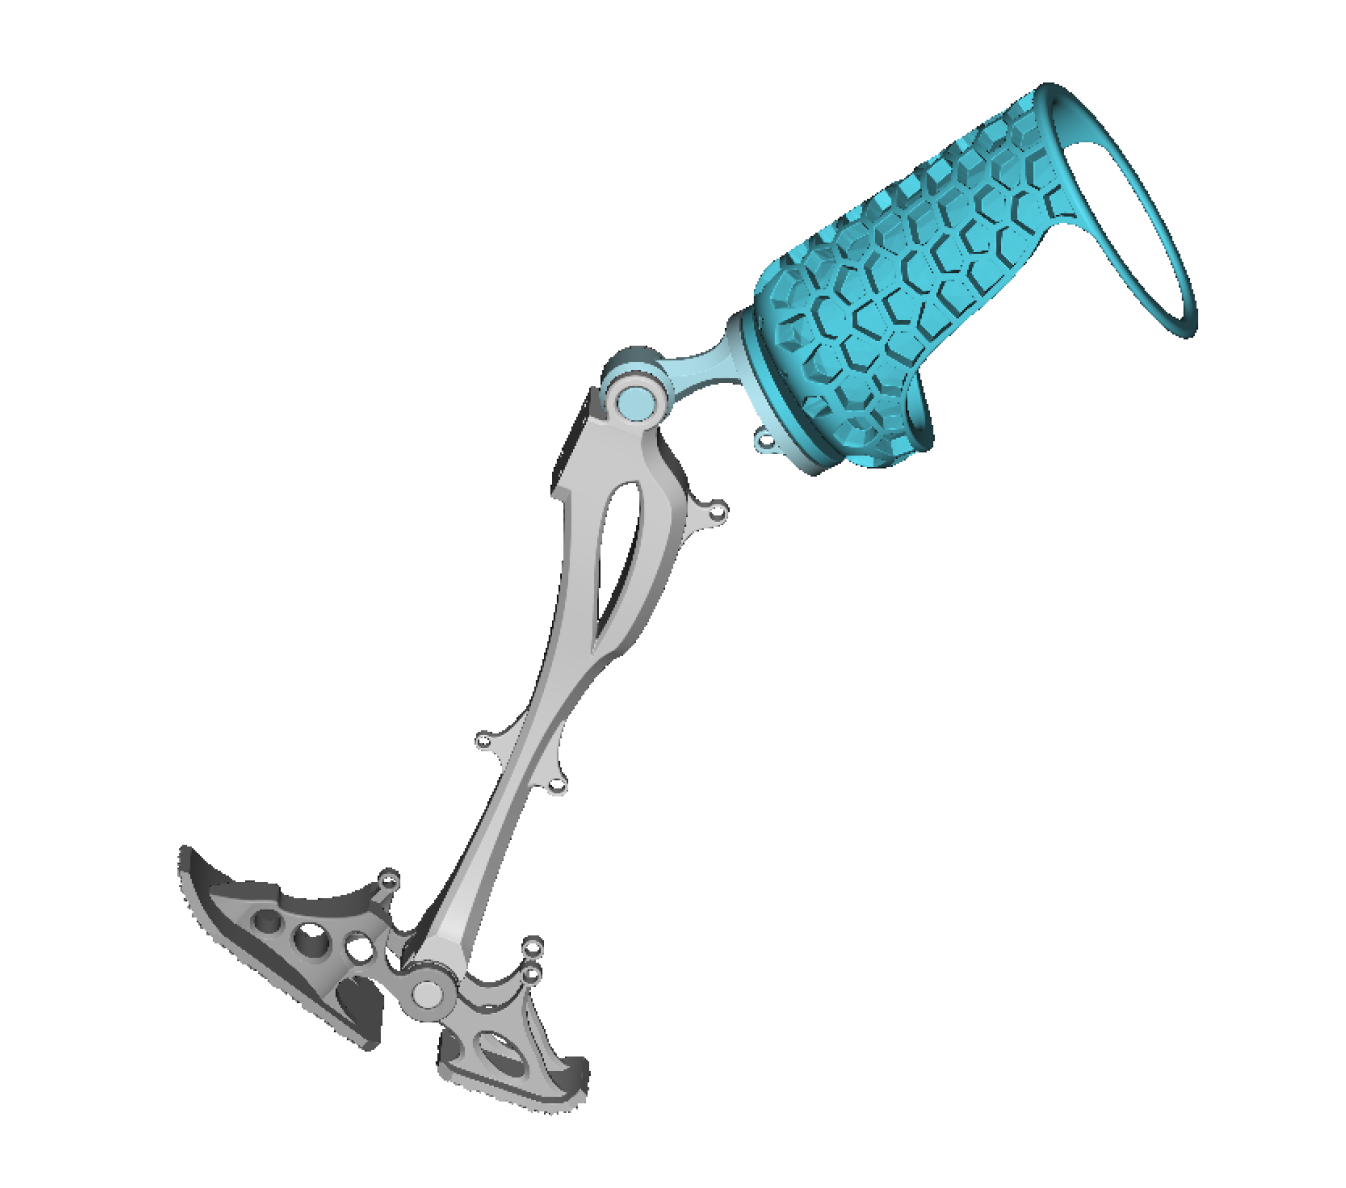
Prosthetic leg featuring custom 3D-printed prosthetic sockets with flexible inner liners, designed in nTop.
For many people living in developing countries, prostheses are out-of-reach. These people often rely on non-profit organizations, like LifeNabled, to access the care they need in their daily lives. Over the past 15 years, LifeNabled has treated patients in Guatemala's poorest areas. However, following traditional prostheses fabrication workflows with limited time available was putting a significant strain on the LifeNabled team of passionate volunteers.
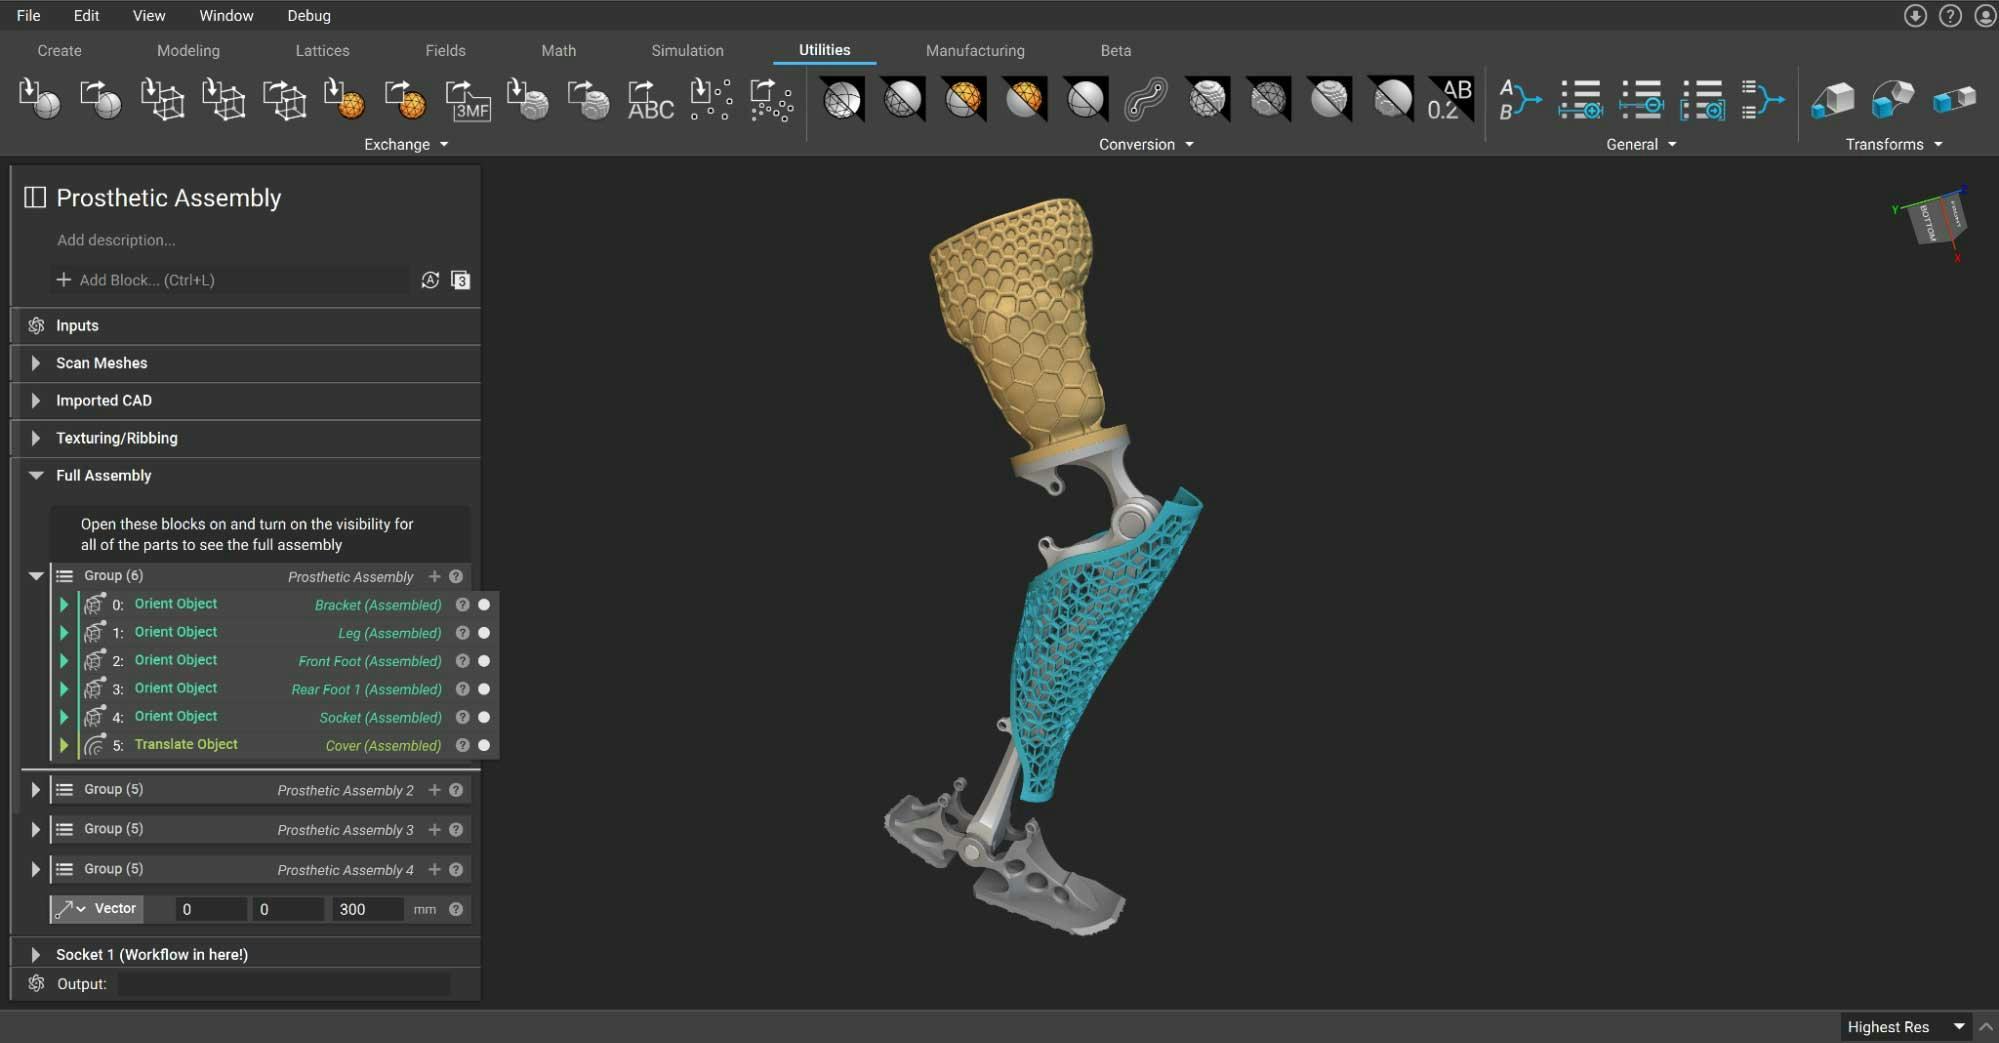
In a recent clinic, the team embraced a fully digital workflow. The first step in the new workflow involved evaluating and 3D scanning 35 amputees in just two days. The team then generated the design of each device in nTop, advanced engineering design software for additive manufacturing. Once the designs were approved, they manufactured the custom-fit sockets using HP Multi Jet Fusion (MJF) technology.
In a matter of weeks, the team returned to Guatemala to fit the prostheses to the patients. To reduce the total cost of the prostheses, the LifeNabled volunteers opted for 3D-printed foam inner linings as an alternative to the traditional gel-like inner liners. These flexible linings also offered improved breathability and better hygiene for patients in the tropical Guatemalan weather.
The implementation of the digital fabrication process was a great success, and LifeNabled completed it in just three days, with design time only taking one day.
Important design considerations
Design automation
Manually designing prosthetic devices could require a day of work for a skilled engineer, which contributes to higher lead times and costs. By introducing design automation at every stage of product development, you can improve the financial viability of your prostheses and significantly shorten development cycles. In the case of LifeNabled, the introduction of automation saved the team more than three days of work.
In the research and development stage, design automation allows you to explore the available design space quickly, identify important design variables, and lock in parameters. At the end of this stage, you should have an automated design workflow that only needs new inputs to generate new, pre-validated designs.
Once the workflow is approved, you can deploy it in a production environment. A Graphic User Interface (GUI) allows less technically-adept users to run the automated design process using patient-specific data as inputs. They can then inspect and troubleshoot the results without requiring the time or attention of more experienced designers. This frees them up for more complex tasks.
Once the production volume has reached a critical threshold, automation via a programmatic environment facilitates economic viability. For instance, scripts running on a server or in the cloud can call upon design generation workflows to minimize design time and associated costs.
Creating lattice structures for 3D-printed foams
Lattice structures for 3D-printed foams can be precisely tuned to provide improved strength, flexibility, cushioning, and impact absorption compared to traditional foams. This can enable more comfortable, lightweight designs better suited to a wide range of users. The lattice structure also helps reduce the amount of material needed, making it possible to create prostheses at lower costs.
Data-driven design
Using patient-specific data to drive design variables enables you to create prostheses tuned to each patient's unique physiology. You can derive this data from either simulation data or direct measurements. Design automation allows you to use this data to streamline and scale design operations quickly and efficiently.
Software for designing 3D-printed prostheses
Above-knee prosthesis designed in nTop.
With the increasing popularity and widespread use of additive manufacturing, there is a rising demand for software that can take full advantage of its design freedom. nTop is a next-generation design software that provides a clear pathway for personalization at scale and gives you access to design tools to develop innovative medical devices that improve patient outcomes.
With nTop, you can quickly and easily design custom medical devices that meet the unique needs of your patients. Find out more about personalized medical devices in our comprehensive guide.
Key takeaways
- Customization is common in prosthetics, but traditional workflows are manual and rely on the technician having a high level of skill and expertise.
- Prosthetic devices manufactured following a digital workflow, which offers many benefits, are becoming more popular but still occupy a relatively small portion of the market.
- Advanced engineering design software like nTop can help you realize the full potential of a fully digital workflow and significantly improve your 3D-printed prosthetic designs.

nTop
nTop (formerly nTopology) was founded in 2015 with the belief that engineers’ ability to innovate shouldn’t be limited by their design software. Built on proprietary technologies that upend the constraints of traditional CAD software while integrating seamlessly into existing processes, nTop allows designers in every industry to create complex geometries, optimize instantaneously, and automate workflows to develop breakthrough parts and systems in record time.
Related content
- VIDEO
Design better implants for osseointegration with the Lattice Pore Size Block

- VIDEO
nTop CDS 2024: Exploring the cutting edge of computational design with Matthew Shomper

- CASE STUDY
Cobra Golf designed their LIMIT3D irons 50% faster with nTop

- GUIDE
Download: Advanced design software and additive manufacturing for personalized implants
- GUIDE
Download: Design Automation for Medical Devices